About Zoom
What is Zoom?
Zoom is free cloud-based software that allows users to conduct meetings no matter where they are. Yoyaq uses Zoom to provide our interpreting service.
Why does Yoyaq use Zoom?
![]()
Connect with a single click
Just click the URL in your e-mail, and youŌĆÖre automatically connected. ThereŌĆÖs no need to register or create an account like you have to do to use Skype.
![]()
Record with a single click
This handy function allows you to go back later if you missed an explanation by the interpreter, need to review or your connection gets interrupted.
![]()
Works on smartphones
Although it requires installation of the free Zoom app, you can also connect easily from your smartphone. The amount of data transfer is small, so the connection is stable and wonŌĆÖt result in high communication charges.
![]()
Free, easy, and feature-rich!
Not only is it easy to use, but it also has various features, including video calls, screen sharing, and whiteboard sharing.
Using Zoom
*Be sure to share the meeting URL to be used for the meeting with the interpreter after making your reservation.
PC
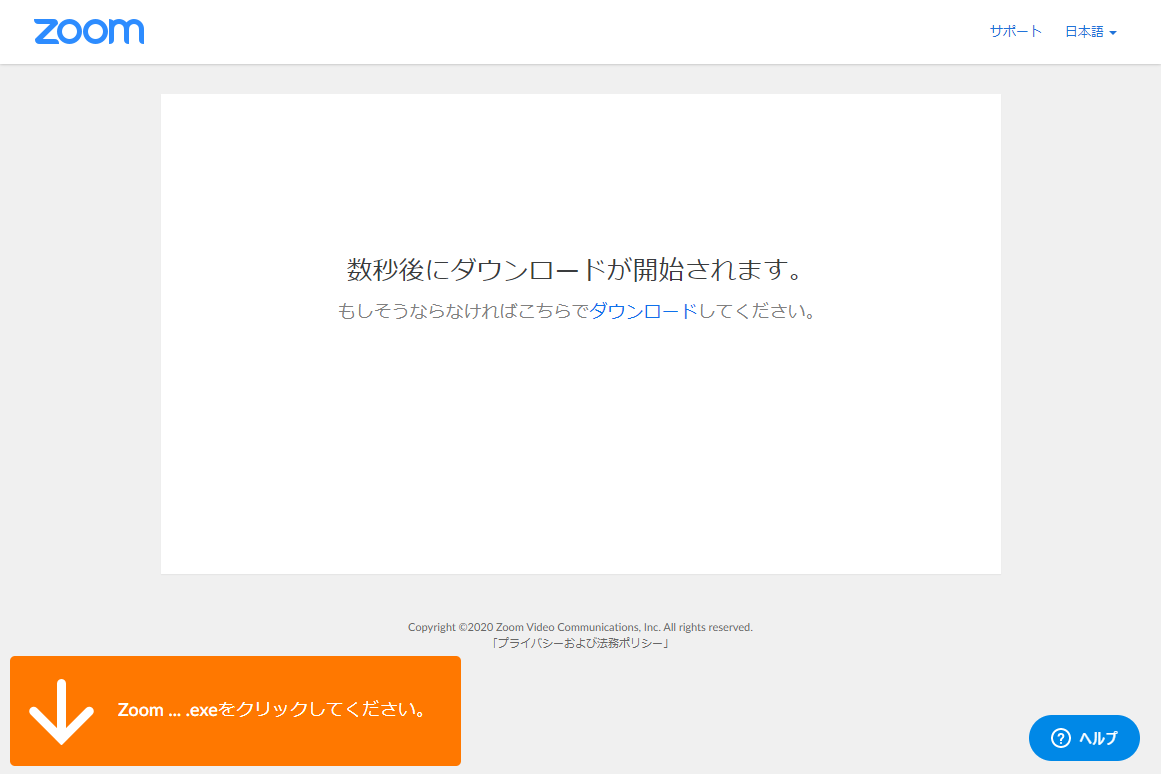
Download
There is no need to install the Zoom app beforehand if participating via PC. (Details for joining meetings via smartphone or tablet are provided below.)
If itŌĆÖs your first time, click the URL in your e-mail before the meeting begins. If the download does not start automatically, click ŌĆ£Download.ŌĆØ
Installing the app
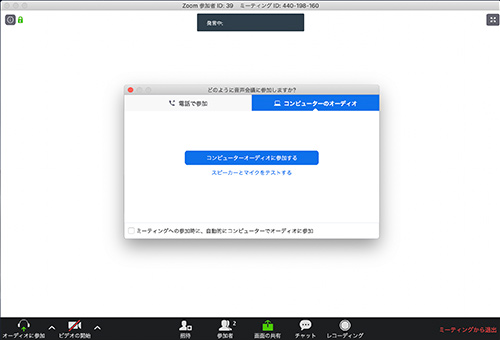
If itŌĆÖs your first time using Zoom, the app will be installed automatically.* Takes 1-2 minutes.
From the second time onward, the app will launch automatically. When you launch Zoom, a message will pop up in the middle of the screen saying, ŌĆ£Join Audio by Computer.ŌĆØ Click the blue button. The icon in the bottom left corner of the screen will then change from headphones to a microphone.
Starting a meeting
If the icon changes to a microphone, you have joined the meeting. Say something and make sure the blue meter in the microphone icon moves.
*Have you shared the meeting URL with the interpreter beforehand?

Smartphone or tablet
Installing the app
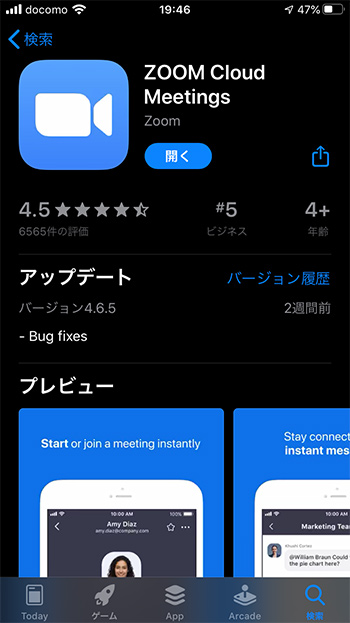
There is no need to install the Zoom app beforehand if participating via PC, but you do need to install it in advance on a smartphone or tablet.
Launch your app store and install the Zoom Cloud Meeting app.
*On Android devices, this is called GooglePlay, and on iPhones, it is called the App Store.
After installing, tap ŌĆ£OpenŌĆØ to launch the app.
Clicking the URL
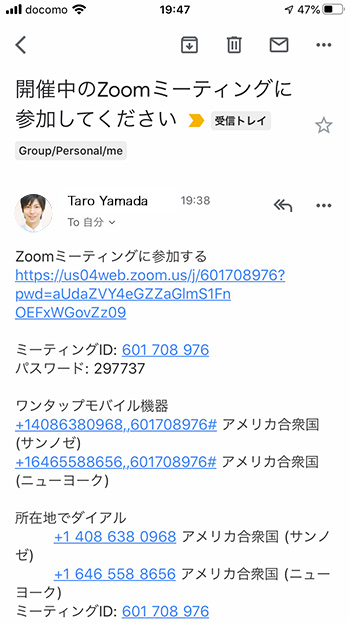
1. A URL for joining the Zoom meeting will be shared by the meeting host beforehand. The 9-digit number is entered when joining the Zoom meeting.
2. Tap ŌĆ£Join meetingŌĆØ > Enter the 9-digit meeting ID from the e-mail and you name > Tap ŌĆ£Join meetingŌĆØ
ThatŌĆÖs it!
*Have you shared the meeting URL with the participants?
Starting a meeting
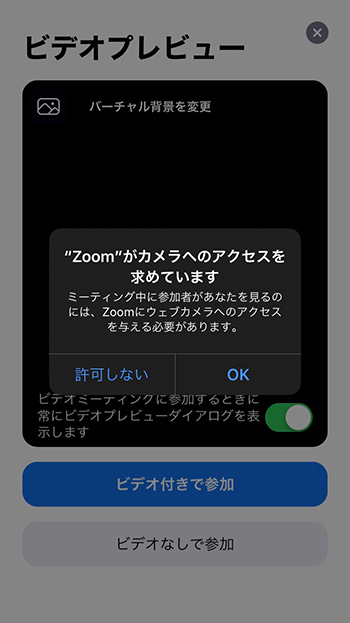
When joining a Zoom meeting for the first time, a confirmation message will appear for granting access to your camera and microphone as shown in the picture to the right. Tap ŌĆ£OK.ŌĆØ If you tap ŌĆ£Call via Device Audio,ŌĆØ your microphone will become active.
From the second time on, when you click the link in your e-mail, the app will launch automatically so that you can join the Zoom meeting.
*Have you shared the meeting URL with the participants?
How to Use Zoom
Turning your microphone on and off
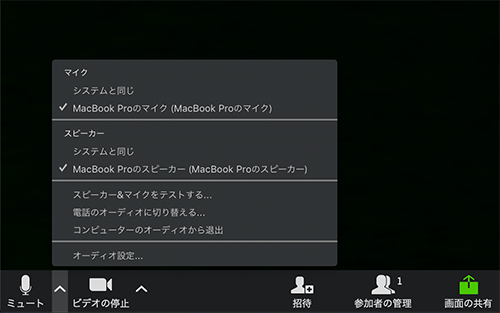
Look at the microphone icon in the bottom left corner of the Zoom screen. If the microphone is connected, when you say something, the blue meter will go up and down as you talk. If you say something, but the blue meter does not move, click the chevron next to the microphone icon to bring up a list of options. Check to make sure the microphone you are using is correctly selected.
To mute your microphone, click the microphone icon. If a red slash appears through the icon, it means you are muted. Click the icon again to unmute.
Turning your camera on and off
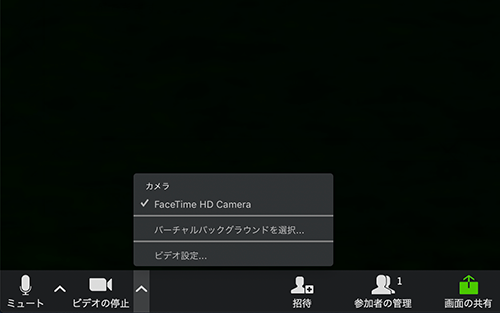
The second icon from the left at the bottom of the Zoom screen is the camera icon. Click the camera icon to turn your camera off. An icon will be displayed on the screen. Click the camera icon again to turn the camera back on, and your face will appear on the screen.
If your camera is not working, click the chevron next to the camera icon. This will bring up a list of options. Check to make sure the camera you are using is correctly selected.
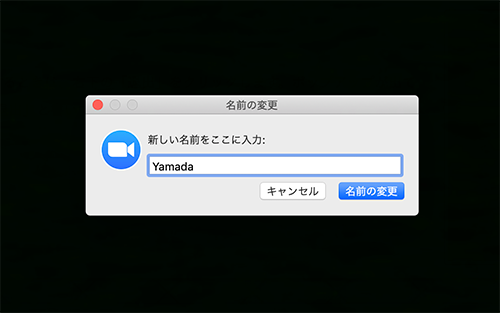
Changing your name
Your name is displayed under the area where your face appears to the left. To change the name that is displayed, move the cursor over the area where your face appears and click it. (Right-click for Windows computers)
Choose ŌĆ£Change nameŌĆØ from the menu to bring up a pop-up dialog. Enter your desired name in the input field. The menu may not be displayed on older versions of the app. In such cases, you can change your name using the method below.
Click ŌĆ£ParticipantsŌĆØ in the icons at the bottom of the Zoom screen to bring up a list of participants on the right side of the screen. Find your name on the list. When you place the cursor over your name, a ŌĆ£Change nameŌĆØ button will appear. Click that button and change your name.
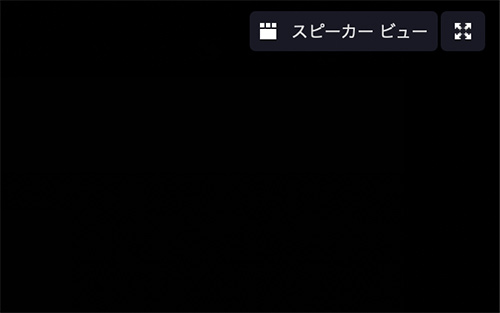
Changing the view
Zoom has two view that you can switch between.
- Gallery view: Displays all participants in a grid
- Speaker view: Displays a large view of the active speaker
Check in the upper right to see if the view is set to ŌĆ£Speaker view.ŌĆØ If it is in gallery view, you can click it to switch to speaker view.
Sometimes you may only want to see one speaker in speaker view. You can pin the video by clicking (right-click on Windows computers) the speaker whose video you wish to pin and selecting ŌĆ£Pin Video.ŌĆØ
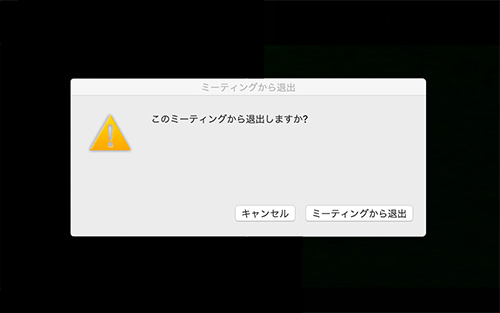
Leaving a meeting
To leave a Zoom meeting, click ŌĆ£EndŌĆØ in the bottom right corner of the screen. Click ŌĆ£Leave MeetingŌĆØ in the pop-up dialog that is displayed to leave the room.
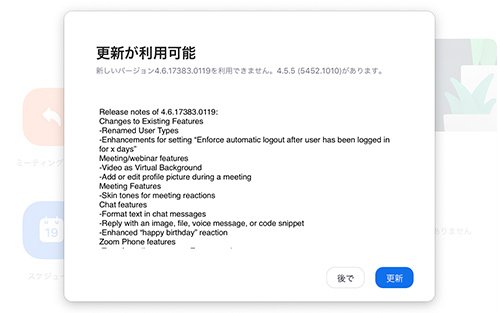
Updating to the latest version
Update from the Zoom app on your PC. Launch the Zoom app, and click the name icon (if you have set your profile picture, your picture is displayed instead of an icon) to the right of the search box to bring up the menu.
Click ŌĆ£Check for UpdatesŌĆØ to see if there is a newer version. This will bring up the window to the right.
After a while, the download will be complete, and if there is a newer version, it will say, ŌĆ£Update Available.ŌĆØ
Click ŌĆ£New FeaturesŌĆØ to see what new features are available with the latest version. After reviewing the information, click ŌĆ£Update Now.ŌĆØ This will install the latest version. To check whether the update was installed, click ŌĆ£Check for UpdatesŌĆØ again.
Zoom screen sharing
Your computer screen can be displayed for both users and the interpreter.
This is convenient for having discussions while looking at the same material. You can make comments on the material or mark it up.
Here we explain how to share files and whiteboards and add comments.
Screen sharing
To share your screen:
- Click the ŌĆ£Share ScreenŌĆØ button on the menu at the bottom of the screen. Have the file you wish to share open already.
- Select the file you wish to share and click ŌĆ£Share ScreenŌĆØ in the bottom right corner. You can choose which file to share. To add a comment, click the ŌĆ£Add CommentŌĆØ button on the comment tool bar.
- Use ŌĆ£Stop SharingŌĆØ to end screen sharing.
Whiteboard sharing
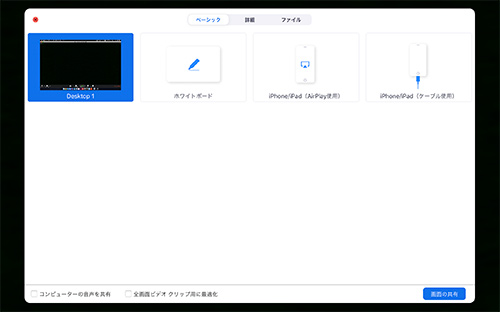
Click the ŌĆ£Share ScreenŌĆØ button on the menu and select ŌĆ£Whiteboard.ŌĆØ
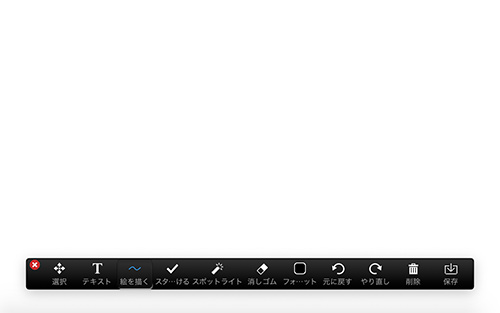
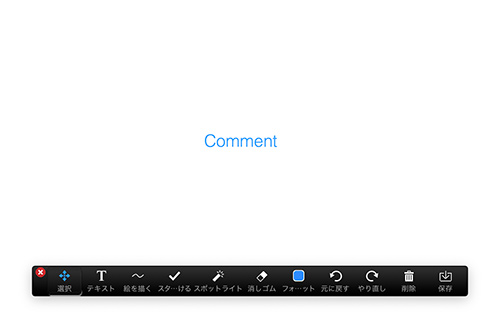
Adding comments
You can add comments to the shared screen. Comments you write are displayed to participants (including the interpreter).
- Click the inverted triangle beside ŌĆ£Display OptionsŌĆØ in the upper right corner.
- Select ŌĆ£Add CommentŌĆØ on the menu that appears.
- A toolbar will be displayed allowing you to write on the screen.
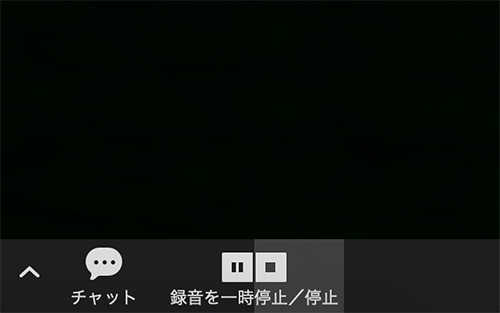
Recording
Click ŌĆ£RecordŌĆØ and select ŌĆ£Record on This Computer.ŌĆØ In the upper left corner it will say, ŌĆ£Recording,ŌĆØ and at the bottom there will be an option to pause or stop recording. When the meeting ends, the recorded video will be displayed automatically.